Many homeowners do not think about their laundry room ventilation until a problem happens. A clean setup helps your machine run fast and lowers your monthly power bills. More importantly, a good setup keeps your home safe from dangerous house fires. Over time, thick lint traps heat and stops the air from moving out safely. This is why a proper dryer pipe installation is a very smart weekend upgrade. If you have an old foil hose, you should switch it out soon. A brand new dryer vent pipe installation is simple when you follow the right system step by step. You do not need costly tools to fix this part of your home. Any person can handle this job by using this easy setup guide.
Step 1: Map Out the Shortest, Straightest Route
A proper dryer pipe installation protects your family and keeps your machine running great. You must plan the shortest path to the outside before you buy any parts. A straight path lets the wet air exit without any slow spots. Building rules say the total run should be under thirty-five feet long. You must subtract five feet for every sharp turn you add inside the line. Never let the air blow into a crawl space or an attic. Trapped wet air creates dark mold and destroys your wood frames quickly. Always push the air directly out through an outer wall of the house. This plan keeps the airflow strong and stops lint from building up inside.
Step 2: Prepare the Exterior Vent Opening
The next part of a dryer pipe installation requires you to prepare the outer wall exit hole. You should look at the old vent cap to see if it opens well. If you must cut a new hole, mark the spot on the wall first. Check for wall studs or electrical wires before you start to cut the area. Use a small hand saw to cut through the soft interior sheetrock wall. Use a stronger saw for the outer wood siding of your home structure. Put the outer vent hood into the hole from the outside of the house. Use good outdoor screws and clear silicone sealant to keep rainwater out completely.
Step 3: Measure and Cut Your Rigid Metal Pipes
Now you can start your dryer exhaust pipe installation by cutting the metal tubes. Rigid aluminum tubes are best because the inside wall is smooth and safe. Put on thick gloves because the cut edges of the metal are very sharp. Measure each straight section carefully before you make any cuts with your tools. Remember that the tube ends must slide into each other by two inches. Use tin snips to trim the metal tubes down to the perfect length. Always face the small crimped end away from the laundry machine back side. This trick keeps the lint from getting caught on the metal edges inside.
Step 4: Assemble the Joints and Corners
You must connect the pieces together to finish your dryer exhaust pipe installation correctly. Use adjustable metal elbows to turn the corners around your laundry room walls. Slide the tube sections together tightly so they do not fall apart later. Do not use metal screws to hold the joint pieces together at all. Screws catch loose lint inside the tube and create a bad fire hazard. Use heavy aluminum foil tape to seal every open seam very tightly. This special tape stays strong when the air gets hot during the drying cycle. Your system will stay sealed tight for many years when you use foil tape.
Step 5: Attach the Pipe to the Dryer and Vent Hood
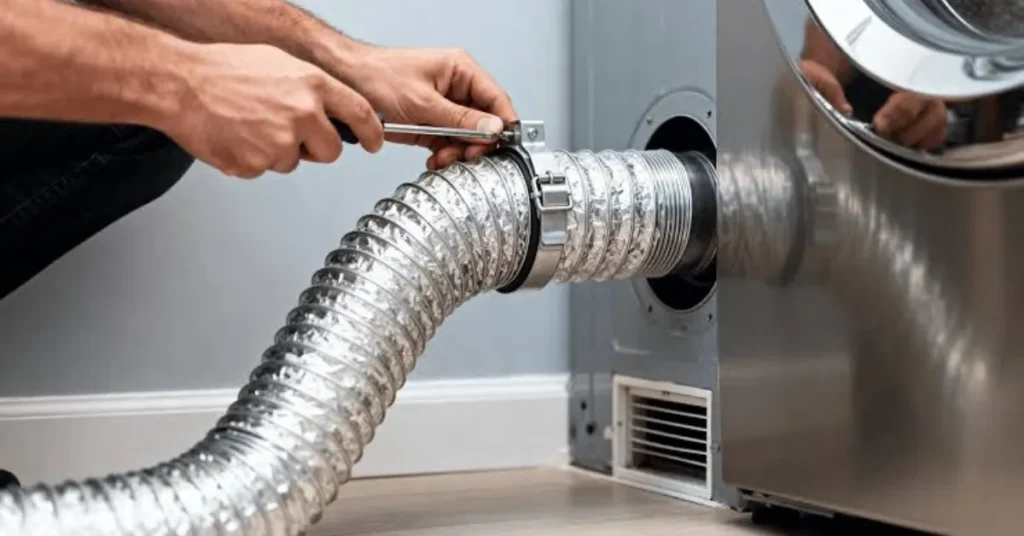
You are now ready to learn how to install a dryer vent pipe safely with MDF Air Duct Cleaning. Slide a strong metal ring clamp over the back exit of your machine. Push the first metal elbow onto the machine and tighten the ring clamp. Go to the other end and connect the tube to the wall vent. You can use a short flexible metal tube if space is tight. Keep this soft tube under eight feet long so it stays straight. Never let the soft tube twist or smash against the laundry room wall. A smashed tube stops the air and makes the machine get too hot.
Step 6: Inspect and Test Your Work
You must test the system before you use the machine for real clothes. Push the machine back into place but do not crush the metal tubes. Check every joint to make sure the tape did not come loose. Turn the machine on the air cycle to test the new air path. Walk outside to see if the wall vent flap opens up all the way. Look for any air leaks along the seams of the metal tubes. Clean the outer vent cap every few months to keep it clear. If you need help with your tubes, call MDF Air Duct Cleaning.
You can reach the team at (224) 463-7739 or email mdfairduct@gmail.com today.
Frequently Asked Questions
How often should I clean my new dryer vent tubes
You should clean the tubes at least once every year to stay safe. If you have a large family, clean them two times a year. Regular cleaning stops lint buildup and keeps your machine running fast. You can look at the outer vent to see if lint is blocking the air.
Can I use regular gray plastic duct tape for the joints
No, you should never use regular gray cloth duct tape for this job. Plastic duct tape dries out quickly and falls off when the metal gets hot. Always use approved aluminum foil tape because it handles high heat and seals the seams perfectly.
What is the best material to use for a dryer vent
Rigid aluminum or galvanized steel tubes are the absolute best choice for safety. They have smooth inside walls that do not trap flying lint pieces easily. Flexible foil or plastic hoses are dangerous because they sag and trap heat very quickly.
Why is my clothes dryer taking two cycles to dry my laundry
This problem usually means your vent line is blocked by thick lint or smashed behind the machine. When air cannot escape, the machine stays wet inside and cannot dry clothes. Cleaning or replacing the line with rigid pipe will fix this issue fast.
Can I vent my clothes dryer into my basement or attic space
No, you must never vent the machine inside your home structure. The exhaust air contains a large amount of water and loose lint particles. Venting inside will cause dangerous mold growth and ruin your wood beams over time.